As mentioned in my last post, I am making 2 new blankets for Miss K. Its sort of a case of reverse nesting. I never got to nest because Kahlen arrived so early so I'm giving it some effort now. Ha! It gives me the chance to make her something, and it keeps me from going stir crazy too.
So... The first blanket:
Choose two different colours/patterns of fleece fabric. I chose one solid and one pattern, but you could use two solids or two patterns if you wanted. Make sure the fleece isn't too thick, or it will ruin your scissors and give you a bunch of trouble! Also, the size/amount of fabric depends on how big you want your blanket to be. My pieces are roughly 1.5 meters and make a blanket large enough to cover Kahlen's crib mattress completely. Since I am making 2 blankets I wanted one to be big enough to grow into.
Grab your sewing box (or in this case Aunite Scotts), even though this is a "no-sew" project.
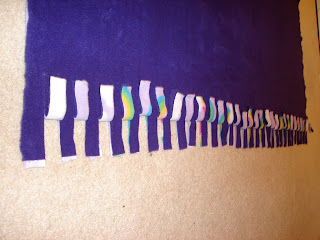
Lay the pieces of fabric on top of one another. Fleece is pretty stretchy so try not to pull the weave too tight if you can. Then pin the two pieces together about 7 inches from the edge. Next, you are going to cut strips that are 1 inch thick and 5 inches long along one side of the blanket. You can either cut directly into each side, or fold the side over 2.5 inches (shown above) and then cut.
Cut the entire length of the side. Make sure your scissors are sharp or your hand will really hurt!
Unfold alternating strips...
... and tie knots in everyother set of strips. Make sure to tie both fabrics together into the same knot.
I just lopped and knotted, but you could also use a square or 'regular' knot. Each creates a slightly different look. A looped knot or square knot makes a neater fringe along the edge, a regular knot creates a more wild/fun fringe.
Knot alternating strips of fabric the entire length of the side.
Then flip the blanket over and repeat the same knotting steps. This helps keep the knotted fringe look neater because the bulk of the knot faces different ways, and make things more uniform.
(close up of knots)
This is one finished side. Repeat with the other 3 sides and... TA DA!
Blanket
Miss K hiding in her blanket.
(note: my camera is dying a slow and painful death. I apologize for the increasingly terrible photos)


No comments:
Post a Comment